This blog was originaly posted here
Introduction
How to let a voice assistant handle our To-Do list? In this article, you’ll learn how to build a To-Do list Android app that is powered by an Intelligent Voice Interface and can be controlled with voice commands.
Nowadays voice assistants have become an integral part of our daily life. Let it be asking Google Assistant about today’s weather or asking Siri to call someone, these and the other voice assistants have become vastly popular and are serving our regular needs. Even though these voice assistants help us to do a lot of tasks, there are a lot of restrictions as well and having a personal assistant who listens to our needs and takes care of them is something really special. But making a personal voice assistant is not an easy task. Luckily there is a platform that can handle these problems, Alan AI.
Agenda:
1)What is Alan AI?
2)What we’ll build today?
3) Prerequisite
4) Getting Started
4.1) Create a new Android Studio Project
4.2) Sign up on Alan Studio
4.3) Integrating Alan AI
4.4) Adding custom voice commands
4.5) Setting up the database
4.6) Showing the tasks
5) Conclusion
What is Alan AI?🤔
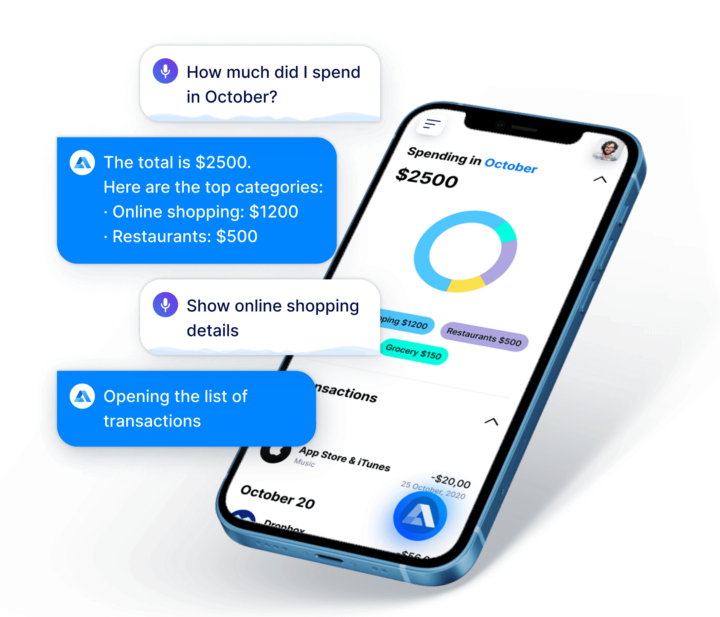
Alan AI is a Voice AI platform for developers to deploy and manage voice interfaces for mobile or web apps.
Alan is an end-to-end conversational AI platform that allows developers to create robust and dependable in-app voice assistants and chatbots. The Alan AI backend handles the majority of the work, including creating spoken language models, training speech recognition software, and deploying and hosting voice components. The awesome thing is that a single developer, without a team of Machine Learning and Dev Ops professionals, can build and create a voice experience for your app using Alan.
Another cool part about Alan AI is that any change to the voice interface is made available to users instantly. This helps us to modify the voice interface, without releasing a new version of the application. Getting started to part with Alan AI is super easy because of their awesome docs and slack community. Along with all this, Alan provides many lightweight SDKs for integration including Android. Today we will be using its Android SDK.
What we’ll build today?
Before we dive into the building, let’s start by having a quick overview of what we are trying to achieve. I’ll also
list a few prerequisites that should help following this article easier.
We’ll build a simple To-Do list app that lets users add, and delete tasks using just voice commands with the help of
Alan AI. By the end of this tutorial, you should have the following application:
Are you excited? I’m excited! Alright, let’s go through a few prerequisites and get started.
- Knowledge of Kotlin, Android frameworks
Getting Started
Step 1: Create a new Android Studio Project
- Open Android Studio and create a new project. Select
Empty Activityfor a fresh start. You can also select a different activity if you want a different layout for your home screen.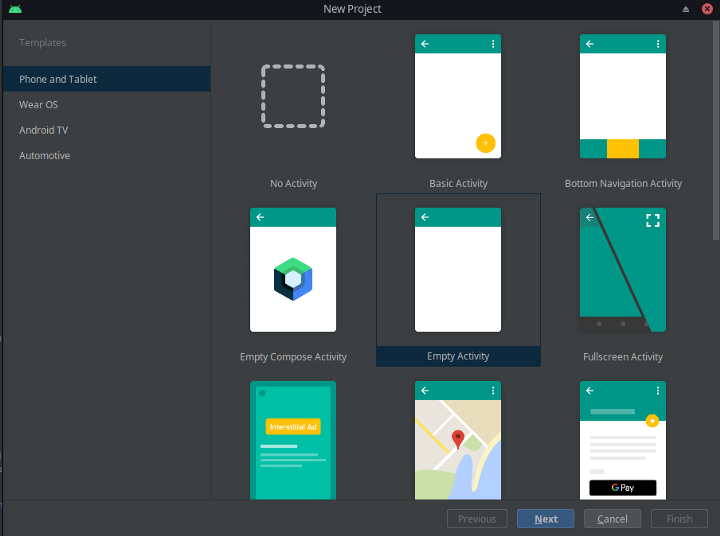
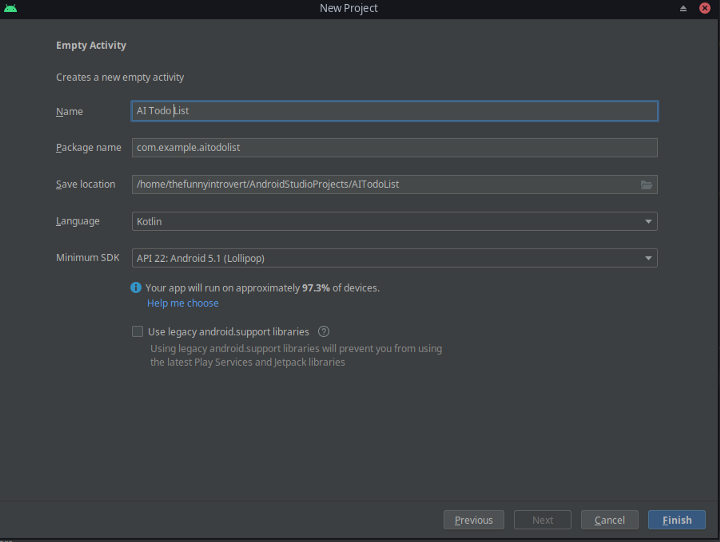
- Name your project, select a location to save your project, and select themin
SDKfor your android app (I would
recommend selecting API 22 which will offer our app to more users). Click onFinish.
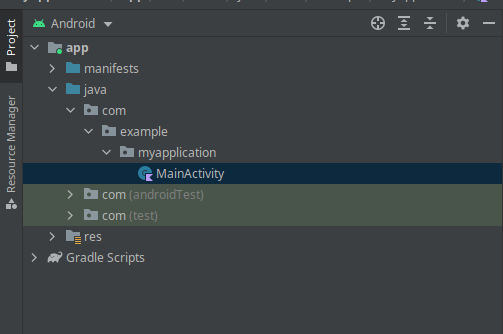
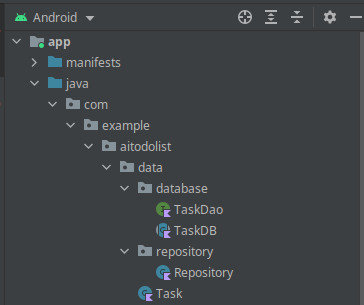
Once we have created the project, we should see a structure like this.
Step 2: Sign up on Alan Studio
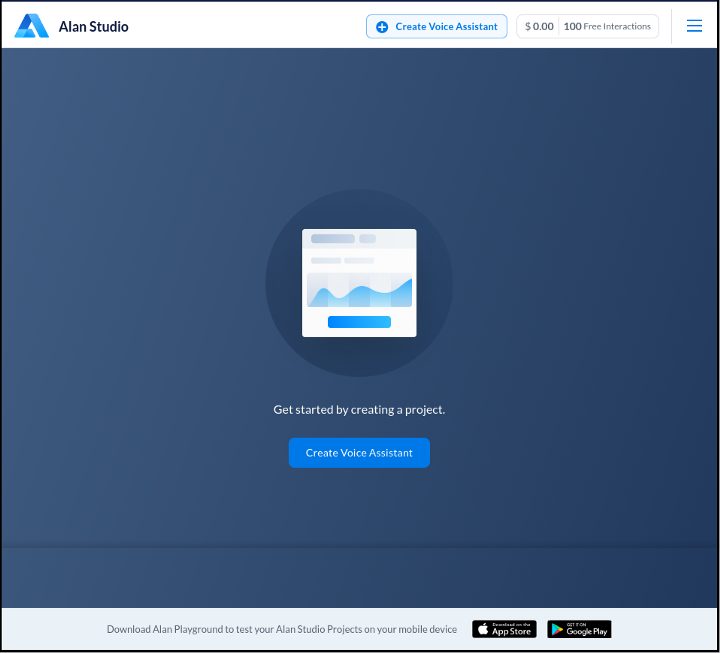
- Open your favorite browser and Sign up for Alan Studio. Once you are done signing
up then just create a project by clicking on Create Voice Assistant button.
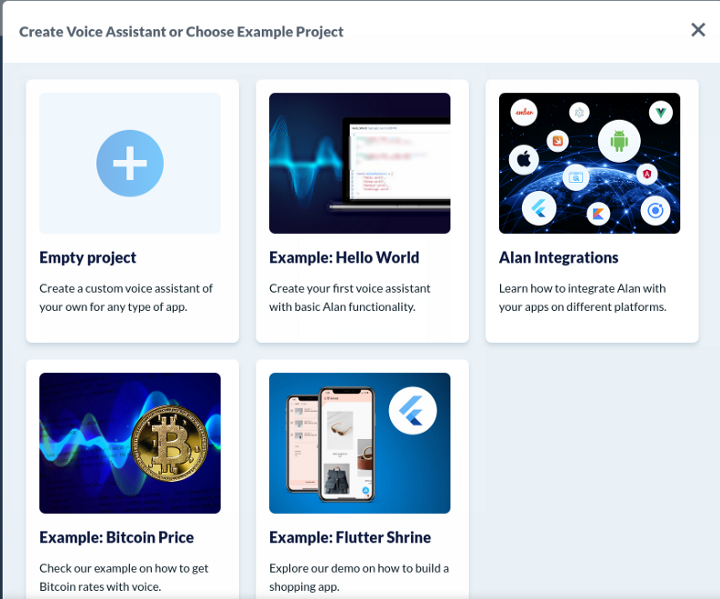
- Create an Empty Project and name your project.
- After Selecting you should see the development page for our project.
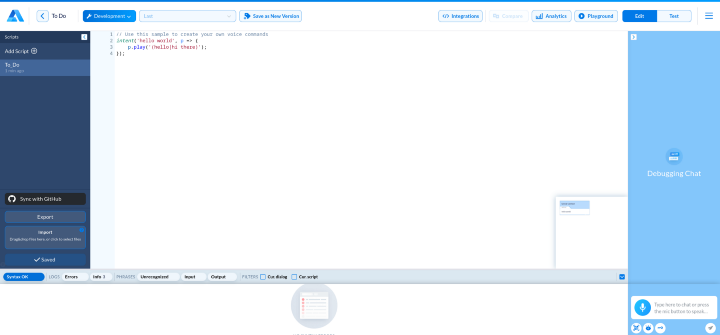
- As you can see Alan AI provides various features that are worth exploring but we will talk about those features in some other blog. For now, let’s get started with the integration of Alan AI in our Android App.
Step 3: Integrating Alan AI
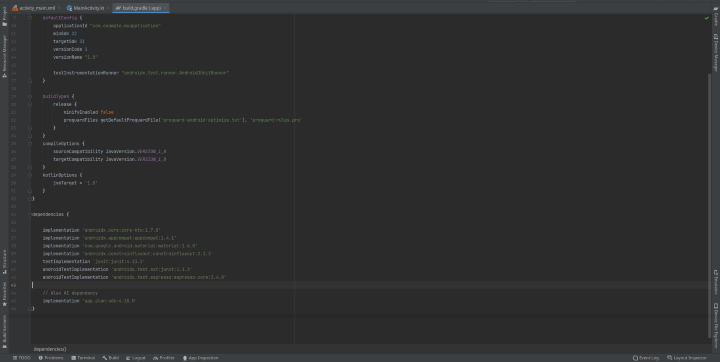
- Start integration by adding the latest Alan AI dependency. Copy the below snippet and paste it into module
level
build.gradlefile in Android Studio.
dependencies {
...
// Alan AI dependency
implementation 'app.alan:sdk:4.18.0'
}
And addjcenter()insettings.gradle. Now click on sync.
dependencyResolutionManagement {
repositoriesMode.set(RepositoriesMode.FAIL_ON_PROJECT_REPOS)
repositories {
...
jcenter()
}
}
- Now, Add the Alan Button in activity_main.xml by copying the below code snippet.
<com.alan.alansdk.button.AlanButton
    android:id="@+id/alan_button"
    android:layout_width="wrap_content"
    android:layout_height="wrap_content"
    android:layout_alignParentStart="true"
    android:layout_alignParentBottom="true"
    android:layout_marginStart="@dimen/fab_margin"
    android:layout_marginBottom="16dp"
    android:visibility="visible"
    app:srcCompat="@android:drawable/ic_input_add" />
3.activity_main.xmlshould have the following code after adding Alan Button.
Note: I have used Relative Layout as parent layout, you may use any other parent layout and change attributes
accordingly.
<?xml version="1.0" encoding="utf-8"?>
<RelativeLayout xmlns:android="http://schemas.android.com/apk/res/android"
    xmlns:app="http://schemas.android.com/apk/res-auto"
    xmlns:tools="http://schemas.android.com/tools"
    android:layout_width="match_parent"
    android:layout_height="match_parent"
    tools:context=".ui.main.MainActivity">

    <com.alan.alansdk.button.AlanButton
        android:id="@+id/alan_button"
        android:layout_width="wrap_content"
        android:layout_height="wrap_content"
        android:layout_alignParentStart="true"
        android:layout_alignParentBottom="true"
        android:layout_marginStart="@dimen/fab_margin"
        android:layout_marginBottom="16dp"
        android:visibility="visible"
        app:srcCompat="@android:drawable/ic_input_add" />

</RelativeLayout>
- Now, let’s get the private key and get started with activating the Alan Button. You can get the private key by clicking on the Integrations button on top of the Alan Studio page.
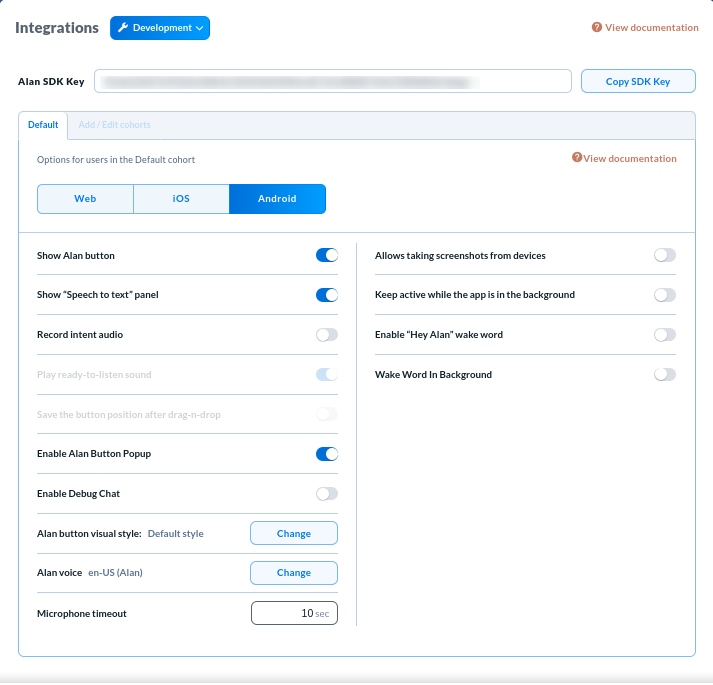
- Click on Copy SDK Key. Go to MainActivity.kt, paste the below script and replace “SDK KEY” with your SDK Key.
class MainActivity : AppCompatActivity() {

    private lateinit var binding: ActivityMainBinding
    private val SDK_KEY = "SDK KEY" override fun onCreate(savedInstanceState: Bundle?) {
        super.onCreate(savedInstanceState)

        binding = ActivityMainBinding.inflate(*layoutInflater*)
        setContentView(binding.*root*)

        // Define the project key
        val alanConfig = AlanConfig.builder()
            .setProjectId(SDK_KEY)
            .build()
        binding.alanButton.initWithConfig(alanConfig)
}
- Note:
*1.This is a secret key, and you should add it to
gradle.propertiesthe file before uploading the code anywhere. You should not expose the token in public, that’s why addgradle.propertiesin.gitignore. 2.*I have usedView binding, you can enable it by pasting the below snippet into module-levelbuild.gradlefile.
android {
... buildFeatures { viewBinding true
}
}
Okay, now let’s try out what we have built. Build the project, tap the Alan button and say “Hello world”.You should hear either “hello” or “hi there”.
You must be wondering how does the bot know what to reply? Remember the development screen of Alan Studio page? There is one command that comes by default, “Hello World”. Let’s look at it,
intent('hello world', p => {
p.play('(hello|hi there)');
});
To understand the above snippet, there is one thing essential feature we need to know — intents.
- Intents are the phrases that we want to recognize — phrases like “Hello World” here or “Add Task”.
- “hello|hi there” this statement let the bot randomly decide any word between hello or hi there. You can add as many words like this as you want. Now let’s add custom voice commands to our app.
Step 4: Adding custom voice commands
-
Time for us to add our voice commands and create a to-do list from it. In this tutorial, we will add only for creating a new task and deleting a task. But you can go creative and make it super cool 😎.
-
If a user says “Add
" or "Insert <task name", we will create a new task with that name. The snippet is really easy, copy the below code and paste it below the "hello world" snippet.
intent('(Add|Insert) $(title* (.+))', p => {
p.play({ commandName: "add_task", title: p.title.value });
});
The above snippet takes the title from the user’s input and speaks that “Adding the task title” and once done adding it speaks “task title Added” (we will add these lines via android studio). Here the title is a task title, the user can tell anything as a task title. There is also some code about commandName and title. We will come to it soon.
Now save the code by clicking on Save Changes. Let’s test the command we just added. Go to the Debugging Chat on the right side of the page and type add < task name>. I typed “add write blog”.
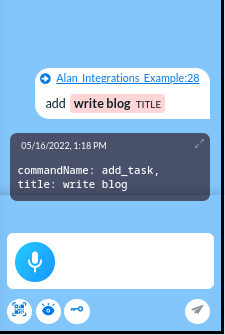
You should see the same replies as mine(the task name will be different based on what you typed). This means that adding task command is working fine, now let’s quickly add for delete task too.
intent('(Delete|Remove) $(title* (.+))', p => {
    p.play({ commandName: "delete_task", title: p.title.value });
});
Test the code.
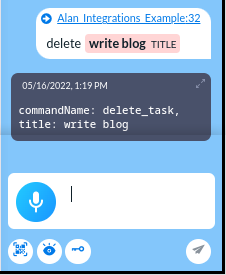
And it’s working perfectly!! Let’s integrate these commands into our app to add a task and delete one.
Integrating these commands into our app is really easier, we will be just using their given template and modifying it a little as per our use case(you can get the template from the integrations page and scroll down). Copy the below snippet and paste it below the alanConfig part.
val alanCallback: AlanCallback = object : AlanCallback() {
    /// Handle commands from Alan Studio
    override fun onCommand(eventCommand: EventCommand) {
        try {
            val command = eventCommand.data
            val data = command.getJSONObject("data")
            val commandName = data.getString("commandName")
            Log.d("AlanButton", "onCommand: commandName: $commandName")

            setupCommands(commandName, data)
        } catch (e: JSONException) {
            e.message?.let {
                Log.e("AlanButton", it)
            }
        }
    }
}

// Register callbacks
binding.alanButton.registerCallback(alanCallback)
Here we are parsing the JSON and getting the data from the payload that has all the useful parts. Then we are getting
the commandName that earlier we added to the Alan Studio script. We are using all this under a try-catch block so that
if there will be any exception, it will catch and log it and in the end, we are just registering the callbacks. There is
also a function named setupCommands . Let’s look at that,
private fun setupCommands(commandName: String, data: JSONObject) {
    when (commandName) {
        "add_task" -> {
            val title = data.getString("title")
            // create the task
        }

        "delete_task" -> {
            val title = data.getString("title")
                binding.alanButton.playText("Deleting the task")
                // delete the task
                binding.alanButton.playText("$title removed")
            }
        }
    }
}
Remember, we were having commandName in alan scripts?
p.play({ commandName: "add_task", title: p.title.value });
p.play({ commandName: "delete_task", title: p.title.value });
This is “add_task” is the differentiator that is going to let us know that this command is for adding the task and
“title” as the name of the task said by the user. Similarly, we have “delete_task” for letting us know that it’s for
deleting the task.
In the above snippet of setupCommands, we are checking for the command name and doing the appropriate next steps.
Getting Title -> Playing sound -> Creating Task/Deleting Task ->Playing sound
Now let’s create a database for our app and other appropriate files.
Step 5: Setting up the database
We will be using Android’s room library so before we
start, add these dependencies to your module-level build.gradle file.
def room_version = "2.4.2"
implementation("androidx.room:room-runtime:$room_version")
kapt("androidx.room:room-compiler:$room_version")
implementation("androidx.room:room-ktx:$room_version")
implementation("androidx.room:room-rxjava2:$room_version")

implementation 'androidx.lifecycle:lifecycle-runtime-ktx:2.4.1'
implementation "androidx.lifecycle:lifecycle-viewmodel-ktx:2.4.1"
implementation "androidx.lifecycle:lifecycle-livedata-ktx:2.4.1"
Create files in this particular structure. We have a data folder that contains the database and dao. Dao is Data Access Objects. They are the key classes where you define your database interactions eg. creating tasks, updating, etc. There is a repository class too.
The repository class isolates the data sources from the rest of the app and provides a clean API for data access to the rest of the app.
And lastly, we have a data class namely Task. A Data class is just a set of properties and values for data set allocation. for eg., a task will have a title and description.
Now let’s write code for creating a database and its dao. Open TaskDB and paste the below snippet.
@Database(entities = [Task::class], version = 1, exportSchema = false)
abstract class TaskDB : RoomDatabase() {
abstract val dao: TaskDao

    companion object {
        private var INSTANCE: TaskDB? = null
        fun getInstance(application: Application): TaskDB {
            if (INSTANCE == null) {
                INSTANCE = Room.databaseBuilder(
                    application,
                    TaskDB::class.*java*,
                    "my_todo_list.db"
                )
                    .fallbackToDestructiveMigration()
                    .build()
            }
            return INSTANCE!!
        }
    }

}
There is nothing much to talk about here, we have just created a function that creates the database with the name
of my_todo_list.db if it does not exists else returns the instance of it.
Now open TaskDao and paste the below snippet.
@Dao
interface TaskDao {

    @Insert
    suspend fun createTask(task: Task): Long

    @Update
    suspend fun updateTask(task: Task)

    @Query("DELETE FROM tasks WHERE title=:taskTitle")
    suspend fun deleteTask(taskTitle: String)

    @Query("SELECT * FROM tasks ORDER BY title ASC")
    fun getAllTasks(): Flow<List<Task>>

    @Query("SELECT * from tasks WHERE id = :id")
    fun getTask(id: Int): Flow<Task>

}
As earlier said, our Dao class will contain various database interactions. All the functions do the thing as the name
suggests. @Insert, @Update @Query are just annotations that let us not write all the boilerplate code for SQLite
eg. @Insert will insert its parameters into the database. deleteTask will delete a task from the database having the
same title and getAllTasks returns all the tasks in ascending order.
Okay now, let’s write code for the repository, copy the below snippet and paste it into the repository class.
class Repository constructor(private val taskDao: TaskDao) {

    suspend fun createTask(task: Task) = taskDao.createTask(task)
    suspend fun deleteTask(taskTitle: String) = taskDao.deleteTask(taskTitle)

    val taskList: Flow<List<Task>> = taskDao.getAllTasks()

    suspend fun updateTask(task: Task) = taskDao.updateTask(task)

}
It is similar to what we had in TaskDao, the only difference is that we are not directly interacting with the database.
Now let’s add Task data class, copy the below snippet and paste it into Task .
@Entity(tableName = "tasks")
data class Task(
@PrimaryKey(autoGenerate = true)
val id: Int?,
@ColumnInfo(name = "title")
var title: String,
@ColumnInfo(name = "description")
var description: String?
)
Lastly, let’s create a ViewModel class named TaskViewModel . paste the below code in TaskViewModel .
open class TaskViewModel(application: Application) : AndroidViewModel(application) {

    private val repository: Repository
    val taskList: LiveData<List<Task>>

    init {
        val contestDB = TaskDB.getInstance(application).dao
        repository = Repository(contestDB)
        taskList = repository.taskList.*asLiveData*()
    }

    fun createTask(task: Task) {
        *viewModelScope*.*launch*(Dispatchers.IO) { repository.createTask(task)
        } }

    fun deleteTask(taskTitle: String) {
        *viewModelScope*.*launch*(Dispatchers.IO) { repository.deleteTask(taskTitle)
        } }

}
In simple words, ViewModel is a link between Model and View. It Retrieves data from the Model and exposes it to the
View. Finally, we are done with our database work. Now let’s create the tasks, open MainActivity and replace the code
with the below snippet.
class MainActivity : AppCompatActivity() {

    private lateinit var binding: ActivityMainBinding
    private lateinit var viewModel: TaskViewModel
    private lateinit var taskList: List<Task>

    private val SDK_KEY = "Your SDK KEY"
    override fun onCreate(savedInstanceState: Bundle?) {
        super.onCreate(savedInstanceState)

        binding = ActivityMainBinding.inflate(*layoutInflater*)
        setContentView(binding.*root*)

        viewModel = ViewModelProvider(
            this,
      ViewModelProvider.AndroidViewModelFactory.getInstance(*application*)
        )[TaskViewModel::class.*java*]

        // Define the project key
        val alanConfig = AlanConfig.builder()
            .setProjectId(SDK_KEY)
            .build()
        binding.alanButton.initWithConfig(alanConfig)

        val alanCallback: AlanCallback = object : AlanCallback() {
            /// Handle commands from Alan Studio
            override fun onCommand(eventCommand: EventCommand) {
                try {
                    val command = eventCommand.*data* val data = command.getJSONObject("data")
                    val commandName = data.getString("commandName")
                    Log.d("AlanButton", "onCommand: commandName: $commandName")

                    setupCommands(commandName, data)
                } catch (e: JSONException) {
                    e.message?.*let* { Log.e("AlanButton", it)
                    } }
            }
        }

        // Register callbacks
        binding.alanButton.registerCallback(alanCallback)
    }

private fun setupCommands(commandName: String, data: JSONObject) {
when (commandName) {
"add_task" -> {
val title = data.getString("title")
if (!checkTitle(title, taskList)) {
binding.alanButton.playText("(Adding|Inserting) the task $title")
viewModel.createTask(
Task(null, title, "")
)
binding.alanButton.playText("task $title (Added|Inserted)")
} else {
binding.alanButton.playText("$title already exist!")
}
}

        "delete_task" -> {
            val title = data.getString("title")
            if (checkTitle(title, taskList)) {
                binding.alanButton.playText("Deleting the task")
                viewModel.deleteTask(title)
                binding.alanButton.playText("$title removed")
            } else {
                binding.alanButton.playText("$title does not exist!")
            }
        }
    }

}
// checking if the task exists in database
private fun checkTitle(title: String, taskList: List<Task>): Boolean {
taskList.*let* {
it.*map* { task -> if (title == task.title) {
return true
}
}
}
 return false
}
}
Great, we can now create and delete tasks. you can even build and test it out. You might not see any tasks on screen because we have not implemented them yet. So let’s finish this article by adding it. We will use Recycler View to implement the list of tasks.
Step 6: Showing the tasks
To implement a RecyclerView two sub-parts are needed
- The Card Layout:The card layout is an XML layout that will be regarded as an item in the RecyclerView’s list.
- The Adapter:The main code that controls RecyclerView is the adapter. It contains all of the necessary methods for RecylcerView implementation.
So let’s implement both, I have created a simple card layout for a task. You can copy and make it look better :)
- Create a file named
task_item.xml
<?xml version="1.0" encoding="utf-8"?>
<com.google.android.material.card.MaterialCardView xmlns:android="http://schemas.android.com/apk/res/android"
xmlns:app="http://schemas.android.com/apk/res-auto"
xmlns:tools="http://schemas.android.com/tools"
android:layout_width="wrap_content"
android:layout_height="wrap_content"
app:cardBackgroundColor="@color/white"
app:cardCornerRadius="10dp"
app:cardElevation="3dp"
app:cardMaxElevation="3dp"
app:cardPreventCornerOverlap="true"
app:cardUseCompatPadding="true"
app:strokeColor="#265AE8"
app:strokeWidth="1dp">

    <RelativeLayout
        android:id="@+id/task_layout"
        android:layout_width="match_parent"
        android:layout_height="match_parent"
        android:paddingBottom="10dp">

        <TextView
            android:id="@+id/task_title"
            style="@style/TextAppearance.AppCompat.Large"
            android:layout_width="match_parent"
            android:layout_height="wrap_content"
            android:layout_alignParentStart="true"
            android:layout_marginStart="16dp"
            android:layout_marginTop="16dp"
            android:layout_marginBottom="10dp"
            android:ellipsize="end"
            android:gravity="start"
            android:maxLines="2"
            android:scrollHorizontally="true"
            android:textColor="@color/black"
            android:textStyle="bold"
            tools:text="Sample Title" /> <TextView
            android:id="@+id/task_desc"
            android:layout_width="match_parent"
            android:layout_height="wrap_content"
            android:layout_below="@id/task_title"
            android:layout_alignParentStart="true"
            android:layout_marginStart="16dp"
            android:layout_marginBottom="10dp"
            android:ellipsize="end"
            android:gravity="start"
            android:maxLines="2"
            android:textColor="@color/black"
            android:textSize="14sp"
            tools:text="Sample Description" />

    </RelativeLayout>

</com.google.android.material.card.MaterialCardView>
- Create a file named
TaskAdapter.kt
class TaskAdapter():RecyclerView.Adapter<TaskAdapter.ViewHolder>() {

var taskList: List<Task> = *emptyList*()
set(value) {
field = value
notifyDataSetChanged()
}

override fun onCreateViewHolder(parent: ViewGroup, viewType: Int): ViewHolder {

     val view = LayoutInflater.from(parent.*context*)
        .inflate(R.layout.*task_item*, parent, false)

     return ViewHolder(view)
    }

override fun onBindViewHolder(holder: ViewHolder, position: Int){
val taskItem = taskList[position]

        holder.taskTitle.*text* = taskItem.title
        holder.taskDesc.*text* = taskItem.description }

    // return the number of the items in the list

override fun getItemCount(): Int {
return taskList.size
}

class ViewHolder(ItemView: View): RecyclerView.ViewHolder(ItemView){

val taskTitle: TextView = itemView.findViewById(R.id.*task_title*)
val taskDesc: TextView = itemView.findViewById(R.id.*task_desc*)
}
}
In TaskAdapter.kt , we are just attaching our task_item and then connecting its componentstask_titleandtask_desc.
Every time a new task is added taskList gets updated and a new task is shown on screen.
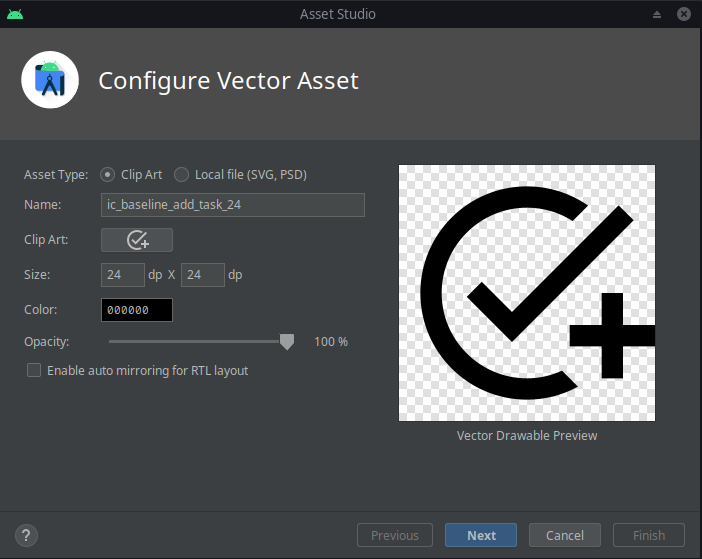
We also have to take care of the UI when there are no tasks added. I have made a simple UI that will be shown when no
tasks have been added. First create a vector drawable ,search “add task” and select the drawable.
Once done, let’s create the layout for no task added and name it no_task_added.xml
```<?xml version=”1.0” encoding=”utf-8”?>
Now let's add a recycler view and connect the adapter to it and add the `no_task_added` layout. Open `activity_main.xml`
and paste the below snippet inside the `RelativeLayout` .
…
…
Now open the `MainActivity.kt` and create an adapter and a function named `setupRecyclerView` .
… private lateinit var adapter: TaskAdapter … private fun setupRecyclerView() { adapter = TaskAdapter()
viewModel.taskList.observe(this) { items ->
    items.let {
        adapter.taskList = it
        taskList = it
    }
// if no tasks added, show no task layout
if (taskList.isEmpty()) {
    binding.noTaskAdded.root.visibility = View.VISIBLE
} else {
    binding.noTaskAdded.root.visibility = View.GONE
}   }
binding.recyclerView.layoutManager = LinearLayoutManager(this)
binding.recyclerView.adapter = adapter } ```
and call the function inside onCreate() . Finally, We are done with everything!!!
Build it and you have your personal voice assistant that handles your to-do list.
You can get the whole code for this article here. Now it’s your time to make it even better and add more features. This article helps you get started with Alan AI. You can of course take the whole application to next level by adding updating tasks, timers, etc. You might have a doubt that can we customize the look of the Alan Button. Let me tell you that Alan Button is highly customizable according to your need. As earlier mentioned, Alan AI has awesome documentation so definitely play around with Alan Assistant and make it way cooler. Everything is extensively documented even getting started with Android here. To read more about Alan AI click here.
Conclusion
Voice assistants are undoubtedly helpful because they allow us to do daily tasks without having to use our hands, and they are getting smarter, and faster, every day. In this article, we learned how Alan can help us to add voice assistance to our applications without having any ML or AI concepts. There are many features that you can add to your voice assistant. If you need any help while doing this, feel free to create an issue on Alan’s GitHub or join their Slack Community for all kinds of assistance.
Lastly, This is the first blog that I have ever written, so I would love to get feedback on my mistakes. I am hoping to
write more articles in the near future. If you need any kind of help in Android, Communities, sessions, or in general
tech-related doubts, Feel free to connect with me: links.cdhiraj40.dev
Thanks for reading!